Thursday 30 April 2015

white shirt shibori - simplicity 1364

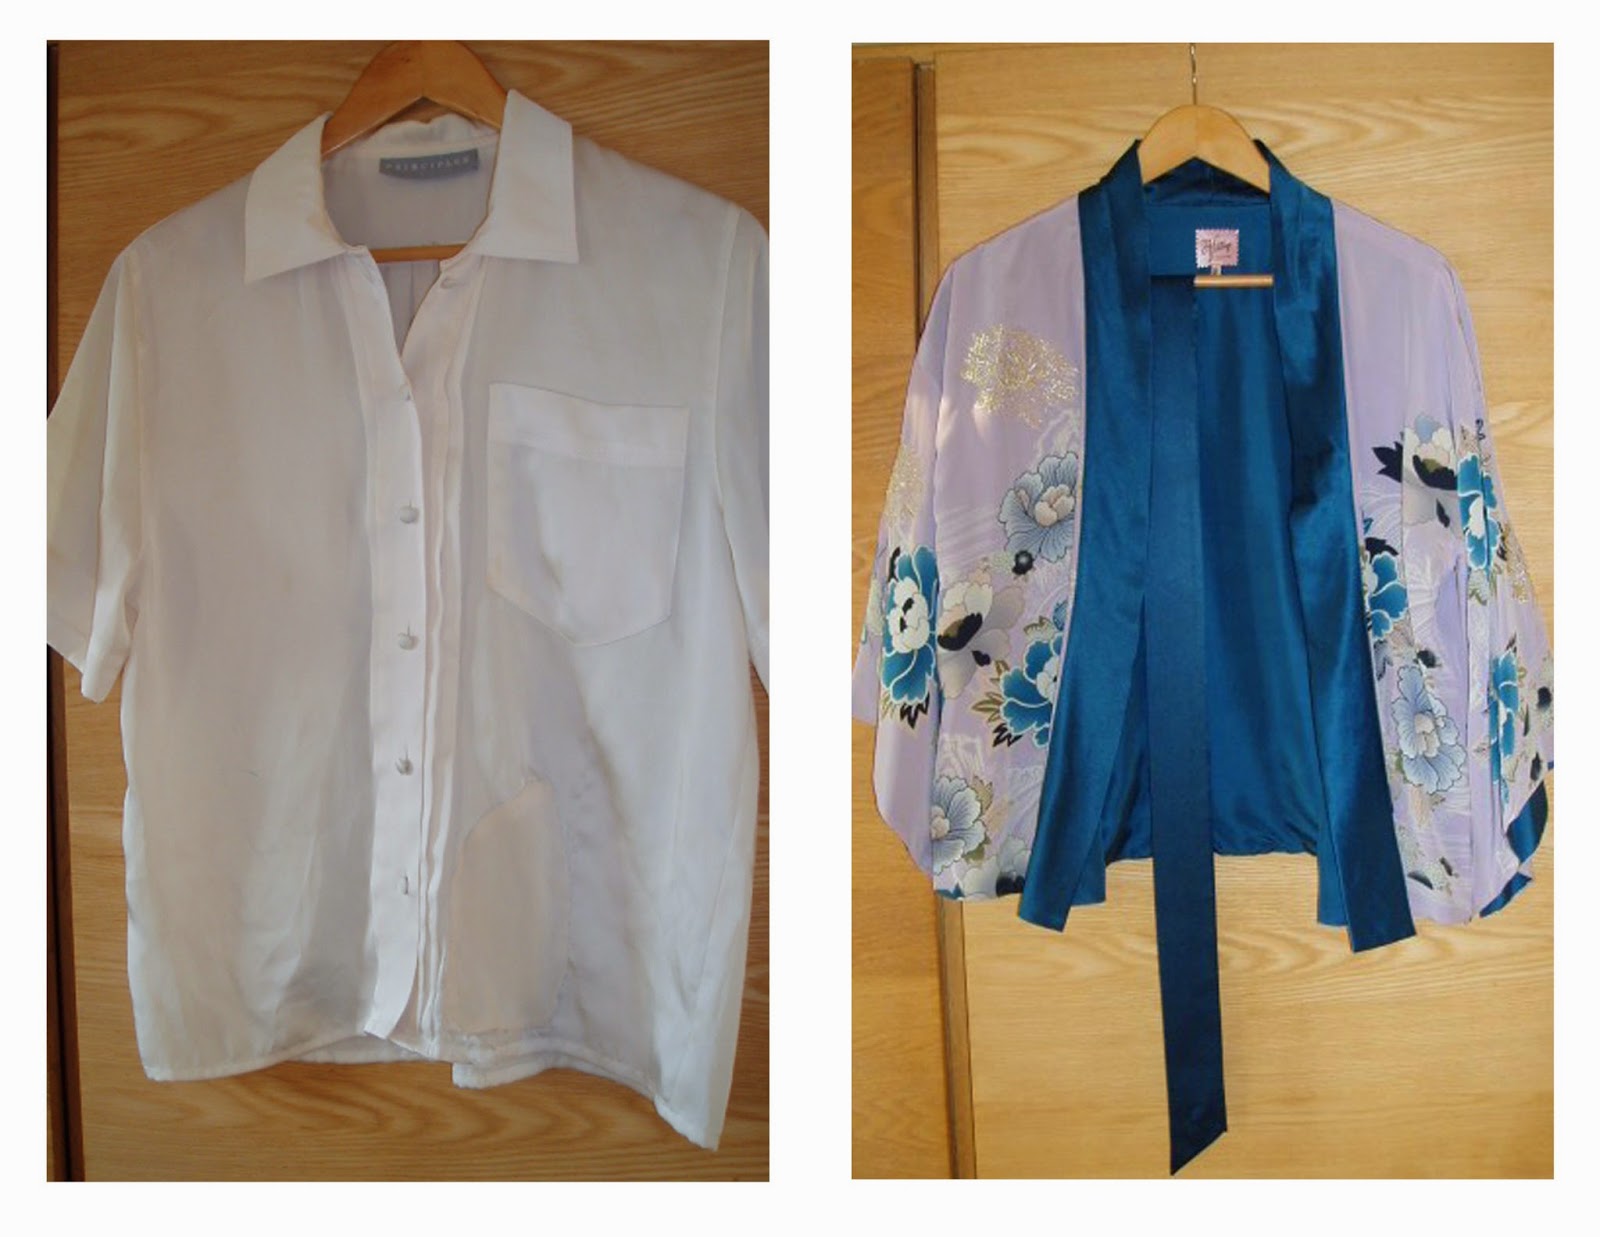
Two white shirts for a euro.  Absolutely beautiful cotton, and my guess is that they were in a 'bargain bin' because they were dress shirts.  I buy mainly from the bargain rail in the charity shops as in someways I think the remakes are a gamble and I am don't wish to be wasteful.  Shirts are rarely, if ever on the bargain rail, so I got these two as I wanted to see if I could make some summer tops. I had a definite plan for one, which was to make a back button shibori summer top - (and I think I have a plan for the other).
simplicyt 1364 shibori

The Simplicity competition supplied the pattern, its a nice summer top, it has a boat neck and simple shaping.  I even picked up the rit dye for another euro in another charity shop - all good!  I made the pattern some weeks ago to see what the shaping was like, and I had to alter the pattern a small bit to make use of the shirt.  The back was taken in a bit, and the curve at the top of the pattern was eliminated.  The front dart was changed to a simpler dart.  I pretty much did this while marking out - I marked the front and then traced the bust dart on a piece of paper, and reconfigured it by opening the dart further up - I removed the main pattern under and marked out the new traced dart.  The sleeves were cut from the sleeves, and I left the cuff opening in the same place. I was going to put a button to sew it shut, but I like it as it is.  


refashion shirt


upcycle mans shirt shibori

Sewing the pattern was pretty straightforward.  I sewed the darts in front and sleeves, and then sewed shoulder seams.  As it was a shirt style sleeve, I sewed it 'flat' as opposed to set in, and then finished sleeve seams, side seams and hems.  I decided to use the cuffs for the facing.  The facing is a little bit too heavy, but I will leave it for the moment (I will wear it for a while and may yet try a small stand up collar).  

I have not done shibori before, but always like the look of it.  I tend to prefer wearing regular patterns like plaid so the 'mokumo' stitching seemed to have a nice regularity to it, and the more uneven the stitching the more successful the outcome!.  While I was reading up on some shibori history, it seems that shibori comes from the making of old clothes to look new, so a lot of aptness there.

I stitched the shirt at 1cm intervals or so, across the width of the shirt, and the sleeves were stitched in the round.  I gathered them as tight as I could and knotted the ends.   I was trying an ombre effect, but its hardly noticeable (and I also had a few other pieces in the dye pot).  I had the top of the blouse wrapped in a plastic bag to protect it, and rinsed the dye off at the end.  I wasn't sure what to do next so I undid the threads (shouldn't have), I think there was still dye in the creases, and some got on the white (which then had to have some bleach on them).  I should have rinsed the dye in hot water and detergent, dry and then loosen the threads - so I will know for the next time.  I was also a bit impatient to see if it worked!  I didn't take any photos of the process as I was too busy keeping an eye on splashes in the kitchen and have one blurred one taken on my 'dumb' phone below.


 I steamed ironed the shibori which should help fix it.  I have to launder it fully yet, so I intend to hand wash the lower half in detergent, dry and steam again, before laundering it fully, and I am unsure how this will work out.  The shibori is a beautiful effect, and I think I would have been equally as happy if I had just left the whole piece dark blue - my original reason for not doing so, was so I could keep the button-up, and the stitching in white may have looked tatt.  As it is, the buttons took some of the colour and I love the effect.  
rrefashion shirt shibori

The other now big plus is, I am going to shibori my 'teen age' smock from last weeks post as I think the repair to the small holes will be concealed better!

Thursday 23 April 2015

some clothes go some clothes stay - and bag finish

 In 1900, 15% of a US household's income was spent on clothing. In 1950, it was still 12%. Even as late as the early 1990s, major purchases of clothing – a suit, a dress, a coat – marked a special occasion or a rite of passage. But by 2004, the total amount spent by households on clothes had dropped to just 4%. By 2010, according to the US Bureau of Labour Statistics, clothing cost the average American family only $1,700 (£1,017), 2.8% of their income. And for that money the consumer gets much more. Cheap no longer means nasty; it just means affordable. In 1997, the average woman in the UK bought 19 items of clothing a year; in 2007, she bought 34. (taken from Guardian article)

In 1997 I probably bought 2 or 3 new garments a year as I was just out of college and still happily shopping in Charity shops, by 2007 I know I probably bought about 12 new items of clothing per year.   I know that one was a cream summer coat which is now in a clear out bag - the fabric is unusual - there is a matt metallic thread in the weave and the fabric seems to have deteriorated and scratches my neck I am unsure should I put it to a charity shop (but then it would just scratch someone elses neck) or make a shopping bag (with cotton handles).....


In the last year I bought zero new ..... and this was sparked by a few reasons


  •  the who made my clothes campaign -. there was a bit of 'become the change' about this, and it is now easier for me to not buy new - but I don'f feel bound by this, but it just happens that I have not bought any new clothes since January 2014 and in general I prefer it this way.  I am due a new pair of jeans and will either make or have to look up ethical manufacturers....................any suggestions welcome (I used get Oasis Eva - and Oasis score 7 out of 20 on some ethical rankings)
  • I became more conscious of the quality and choice in the stores and what was on offer was no longer that relevant to me.  A lot of times I did not like the colour choice on offer and would choose a charcoal version of a style and feel drab as a result, sometimes the hem length seemed to be at the wrong point, the waist seams sitting incorrectly.... I am now consciously remaking my wardrobe and having it function better for me!
  •  fun - once I started remaking, it became a incredibly addictive.  There is plenty to choose from in colour and fabric in the charity shops,  as well as the fabric having proved its wearing ability and colour fastness! The challenge of the remake proved to be a lot more interesting than using new fabric, I am having to make a conscious effort to use stash.  When I started the blog it was just to see how the idea progressed.  I have enjoyed blogging as it did keep me focused and somehow I felt required to finish anything I started and post each week.  Any comments I received I am grateful for as I don't know many home-sewers anymore so it is good to feel somewhat connected with other makers.
I don't know what other people organise their wardrobes, in the spring I generally pack away winter sweaters too early and take out summer clothes too soon. My wardrobe is not especially big, and the two drawers on the lower right tend to be out of season clothes storage. As I pack clothes for storage, I tend to review them both ways and sometimes some are too worn out, too small, and have to go. Others stay and some possible shouldn't, but these three have proved to be perennials... (in my wardrobe for over 10 years!)


The Smock - 
I got this when I was 14, and wore it most summers till I was 26 or so.  I can't remember when but I noticed, but  it had  2 small holes at the shoulder and arm, so it went to my sewing basket for repair...........and stayed.  Last year, I have looked at the tiny holes again and a repair may not work, so I think I may just wear it this summer again and wear it out or figure a new fate for it.  The main endearing quality of this top and why it stayed, is the bat wing sleeve and it was the template for my first home-made pattern.

The Blouse - 
I got this in my 20s, and my sister couldn't believe I still had this one (as she used wear it as well).  I got this when I first started working, and when I went back to college I temped and wore it then too.  It launders a dream.  Soon after buying it, (and while I still doing interviews to get a job), I ironed it, and scorched it, and repaired it.  It tucks into skirts so the repair is never seen and now I see this as part of the blouses history.  It remains in 'back up' clothes storage as it is still potentially useful (as if!) - but  in reality - the main reason I cannot put it to the charity shop is that I am sure they will put it straight in a bin due to the repair (and that seems wasteful - so my dilemma continues.)

The Kimono -
I got this about 12 years ago and love it still. .  I was barely able to afford it but got it regardless,  I just felt so gorgeous when I tried it on - and I didn't regret getting it.    It's from Oasis vintage range (copied vintage finds with a little label on the history, this is based a Shanghai flea market find).  Its printed silk, and embroidered in places with 'gold' thread, and I wear it with jeans (and fake snake skin boots), and its due an outing again soon..............

I thought I would post these to make some contribution to fashion revolution day, the label on the smock is so faded I don't know where it was made, and the other 2 are European made.  I have been checking a lot of the labels in my wardrobe and those up for the refashions and only one was Bangladesh .  I think its so significant that the fashion revolution events are staged as it shows how disposable low-quality fast fashion takes the quality of life away from the workers in these factories, and exposes them to risks I cannot contemplate, and conditions I would not wish on anyone.  The environmental impact of the dyes and fabric manufacturing cannot be overlooked either.  I hope the momentum of fashion revolution day leads to the bigger movement of a  bigger commitment for  fashion companies to take responsibility for the supply chain, better pay and conditions for the workers and the negative impact to the environment.

On another note........
I finally finished the yy bag from February.  I had gotten eyelets probably a bit large, but also with no tool - so had to improvise with a pliers, and hammer - the rivets are 5mm stem screw in (much handier).  I used a charity shop belt . Road tested bag straight away - love this bag already!


Friday 17 April 2015

simplicity tunic 1364 - unfinished dress to finally finished tunic


A few weeks ago, there was a link on the thrify stitcher blog to a competition run by Simplicity -  they were giving a choice of three patterns to try out.  I had been thinking about drafting a sleeved summer top, but when I saw the retro one -  Simplicity 1364 I liked it for a shirt refashion, and thought I would try my hand at this pattern and sent off my details.

The pattern is really simple.
When I laid it over the shirt I was to remake, I wasn't sure.  The sleeve was perfect but there is not enough fabric for the front dart so I thought I would try out the sleeveless version first 


I had a half finished dress (vintage butterick 5191 make), there were 2 reasons it was unfinished.  One was there is a flaw which I didn't notice in the fabric at the time, I bought end roll and only after cutting out some time later, I saw the flaw is at the centre of a centre back panel (typical), and the other is as the dress neared completion, I was less inclined to finish as it had a matron look to it (not in the 'carry-on' movie sense which would not be so bad!). So it was ripe for a remake, as I also wanted to make a tunic to go with some silk trousers. 
butterick 5191 to simplicity 1364

I made a few changes to the pattern.  I wasn't sure about the dropped shoulder in the sleeveless version so I just folded the pattern over.  The pattern was lengthened by 13cm and I put slits at the side.  Originally I didn't have slits but it looked a bit odd, so I undid the seams and made them into slits using some binding to tidy the edges in case they folded over when wearing.  Also I had a feeling that the neckline was big enough to work without the long zip recommended, so I sewed up the centre back and left 10cm at the top and was able to fit it on so I decided I would do a button and loop closure.
refashion dress to tunic

The pattern cut and sewed up fast enough, and all was going along well.  I had decided to do some cream piping at the neckline and double piping on the pockets - and when I was trimming the facing and neckline.....dee-saster...... I hadn't noticed some of the front was caught up - and yup - I snipped it.  So now I had a near-finished-twice-made garment with a huge hole in it.
simplicity 1364 dress to tunic

I left it aside for a few days - and then decided to use the facings to the front and cover the hole and just do a bound neckline, and then the pockets I put a strip of binding across each pocket - the two pockets looked a bit 'overkill' so I left it with one and prefer it a lot more.


So now I have a tunic for the swanky silk pants bought last year in a Charity shop.  They are most probably the last thing I will ever need but the silk is so so lovely and they were so so cheap (well a few euro cheaper than all the other trousers on the rack - maybe for some the cream silk screams high maintenance? I wasn't put off and  this silk has such a pile they have to hang on a padded hanger!.)  They also felt just the thing to pack for 1930s cruise, the illusion was soon shattered when I showed them to a friend - her comment was - 'so very Lucy Ewing!' 

I will try and post a photo later of the ensemble complete when the weather warms up (once I find photographer and some patience on my part...................)

and finally...........

the tunic could have been adapted a few ways - the current front facing is a bit odd looking, so I will launder it (I am still not 100% sure of the colour fastness - I don't generally prewash) and wear it but I am thinking I will try one or two other necklines.  As it was made with the silk pants in mind, I was trying to stick to cream, and I have some ivory silk scrap that could be used for detachable or fixed asymmetric collar, or I could front face in a soft white cotton? 


Friday 10 April 2015

drawers from a duvet - Singer 328

I bought this book - secrets of sewing lingerie -  some time ago after seeing some online reviews, all were especially glowing about the illustrated sewing techniques, and I also thought as it was only a matter of time before I got around to making underwear, I had better buy it! 

 When I first started crochet, I was amazed at the amount of crochet-ers that made dishcloths  (but I 'got it' after a while, as its a handy way to use up end of skeins), and when I started reading sewing blogs I was equally curious about the amount of sew-ers that made their own underwear - and before I knew it, I was planning some sets........


The book is well laid out and clear, and the patterns are not for anyone who likes their vanity sizing - I am the biggest size in the book............ and it certainly felt bigger when cutting the cotton fit.  Initially I made up one pair to see how they worked out, and they are quite good!  I used some duvet fabric (poly cotton) and plain elastic (difficult to get anything swankier in Galway) and I also made them up on my new-used machine, I wanted a small project to try it out.  I have yet to progress onto the other styles in the book.  I will probably try the jersey shorts in a few months and seeing if I can get flatter elastic.  


The new machine is a Singer 328.  My own original machine is a Singer Excelle 6212, and I have it since I was 21 - I bought it myself and it was my biggest ever purchase for a long time - and I justified the purchase as I had just finished an 800 piece patchwork on a hand machine!.  The Excelle is a good machine in general, its mainly metal and fully reliable.  There was an issue over the last few years of power surges, and it would only go at one speed - fast, and it started blowing bulbs last year, so I brought it for repair last year (foot pedal replaced as it was the cause) and it is perfect since - and I can top stitch effectively with it for the first time in years.    Two months ago I saw this singer 328 machine in the Singer shop.  It was just left in for trade-in, and I decided I would buy it, its the same threading and drop in bobbin as my own, does zig zag and all metal (and store warranty).  Singer seems to get bad reviews online - I can only say that I have always found my own Excelle to be incredibly reliable, and am well pleased with the new-used 328.  I am hoping to get some of the original attachments, but the postage online is more expensive than the attachments and in all, so far its working out at the same price as the machine, so I will keep looking and see what turns up!  


one last thing.............
I am changing the name of the blog to 'the up sew'.  I have changed the facebook page, but still not fully au fait with blogging to figure on how to transfer this but it will happen in the next few weeks...................as I said in my post last week, I was thinking of a name change for the past while, and have settled on this one as it seems to describe a bit better on what the blog has evolved to be, and I still don't have a plan, but I do have plenty of refashion projects waiting ....

Monday 6 April 2015

fly by...dress - denim jeans to denim dress


I am slowly building up a collection of old denim jeans as I hope in the future to make cushion covers for a sofa (have to make the sofa) for a room (which also has to be 'made') in the house (all on this pinterest board).  In the meantime, I thought a summer dress would be good too.

I had fully intended to make a denim dress using this butterick pattern, and in my head it was going to take no time as I had the pattern and lots of denim .....what could possibly go wrong?

Well, it turns out, not all my denims are the same, and whatever about shade, the fabric weights would have to be the same for this dress, and enough to get the skirt width and moreover, I wanted to make it in the traditional heavy dark denim - so I would need two pairs of jeans to make the dress, and I didn't find any matching dark denims.  So plan b was called for..... which was just to run up a fun summer dress

Everyone has their own sewing history, and when I was about 15 I started really sewing for myself and it was the total opposite to the sewing I did in school.  My own sewing, was fast fly-by-seat-of-your-pants sewing, a dresses made from old bedsheets and taking in jeans (the original jeggings) - too tight at times and that the seam ripper was used to take them off.   It was also when I started trying my hand making my own patterns (which was a mixture of maths, and freehand cutting).   I remember at the time a relation of mine commenting  that if I wanted to go to fashion college I should learn to sew in matching thread, and while she may have been correct, she was mistaken.  The non-change of thread was my lazy choice and the pattern and trousers were totally made by me and worn by me and I liked them  - they were uniquely mine.  

I do still think that  there is no right way or wrong way to sew anything.  Sewing is just fastening bits together.  There are ways in which the skills of sewing and drafting can be learned in order to execute the concept nearer the vision, but really its just sewing and sewing is creating your own authentic. 
denim upcycle

As I have been doing this blog, I have been enjoying sewing a lot more, and the idea of creating my own handmade wardrobe reminds me of how much I used sew at 16, so that's why I thought I should try to sew a quick dress for fun, a fly-by-the-seat-of-the-pants  type sewing, as I think sometimes trying to find the right pattern for the fabric is a bit slow and slightly tedious.  Obviously, I am more cautious about wasting fabric now and I tend to match thread now but I still figured I should try a freehand type cut....so I marked out some measures - and used a sharpie - just to give it the edge!
denin refashion

I marked a bust dart and had narrowest part of dress just below (as in an empire line) and made the hem as long as I could.  I misjudged the armhole (dreadfully), and ended up patching that later.    The back was cut to match the front - except the back skirt was wider as the back legs of jeans were, and the back did not go out as wide on the bodice.  and  I did put some shaping on the centre front seam,(when I put the dress on inside out, pinned at waist and angled out to centre front seam.   (Truth be told, it would have been more efficient to use a block, but I trying to recreate my measure and mark approach from back when - so in effect the photo above is how not to.)
jeans to denim dress remake

I have not put straps on yet, or made pockets but I do see this as either a sundress, or a jumper dress for winter.   The waistband could also make an interesting detail, or the top of the dress and potential pocket could be trimmed with ric-rac, but it may look odd in winter so will defer for a while on that.  There is enough fabric for both!

It also took about an hour and a half, and I am sure my 16 year old self would have taken far less time (I didn't do fell seams then).   


and just one more thing

as I said in the post earlier, the more this blog is going on the more I am enjoying sewing.  When I started the blog, I figured that I should just do it rather than overly worry on name and layout and concentrate on content and the rest could settle later.   It is now later!!! As I have to even explain the name rudai deata to friends that can speak irish I have decided on a name change so that should happen in the next few weeks.................


Wednesday 1 April 2015

the fantastic studio faro

I love browsing through the Anita's posts on Studio Faro, its so very inspiring, Anita McAdam has a brilliant way of explaining the process.  I don't know where she gets all her energy from because as well as everything else she does, there is a new pattern puzzle each weekend!  

I always find the one piece pattern pieces so appealing so I have a few of the toiles from Anita's pattern puzzles here

The first is the Gil Brandao top
gil brandao bodice scarf to top studio faro


I thought I would have enough in a left over piece of double knit - but it was a bit under, so - just in case - I used a jersey snood/scarf that was given to me (it is a very cheap thin 'pennys' one).  As these thin jerseys happily roll back on themselves, I left the hem about 10 cm plus.  I think I would change it to a bias angle if I was using a woven, and I think it would look even better as a woven.  In  this jersey its fine, but probably only suitable as a beach top as its sooooo sheer!  I am making a few pairs of high waisted trousers this summer so a fabric top like this could be perfect.


The vintage bodice.


studio faro vintage bodice


I love the shape of the pattern, and made it soon after the post.  Only when I went to look at the pattern, I realised I left few notes on i t (no notes apart from CB on one side).  I also had a piece of double knit left over from the pauline dress which just about fitted the pattern.  I sewed up the back seam and then gathered the front a bit, to join to yoke, and then sewed up centre front.  It needs some tweaking, either at the centre back seam or adapting the sleeve as in one of Anita's variations.  The pattern does finish exactly on the waist.  However, it could make a great base for a bodice (I would probably go for a more scooped neckline if I was trying it for real), and also a good base for a bolero.

and finally

The Balanciaga Overblouse

balanciaga overblouse studio faro scarf to top


I made this last summer and had this scarf which I thought would dye well afterwards (it didn't).  

The toile was made, and I was a bit generous and made it a bit big, but even so, at this size it has a 'hippy' look to it and would work well with jeans.  I didn't take it any further as it was probably not something I would wear currently, but if I had a straight skirt cocktail dress, this pattern could certainly make the cutest over-blouse and a lot more practical than a scarf or shawl. 

again, many many thanks Anita for all your shares!