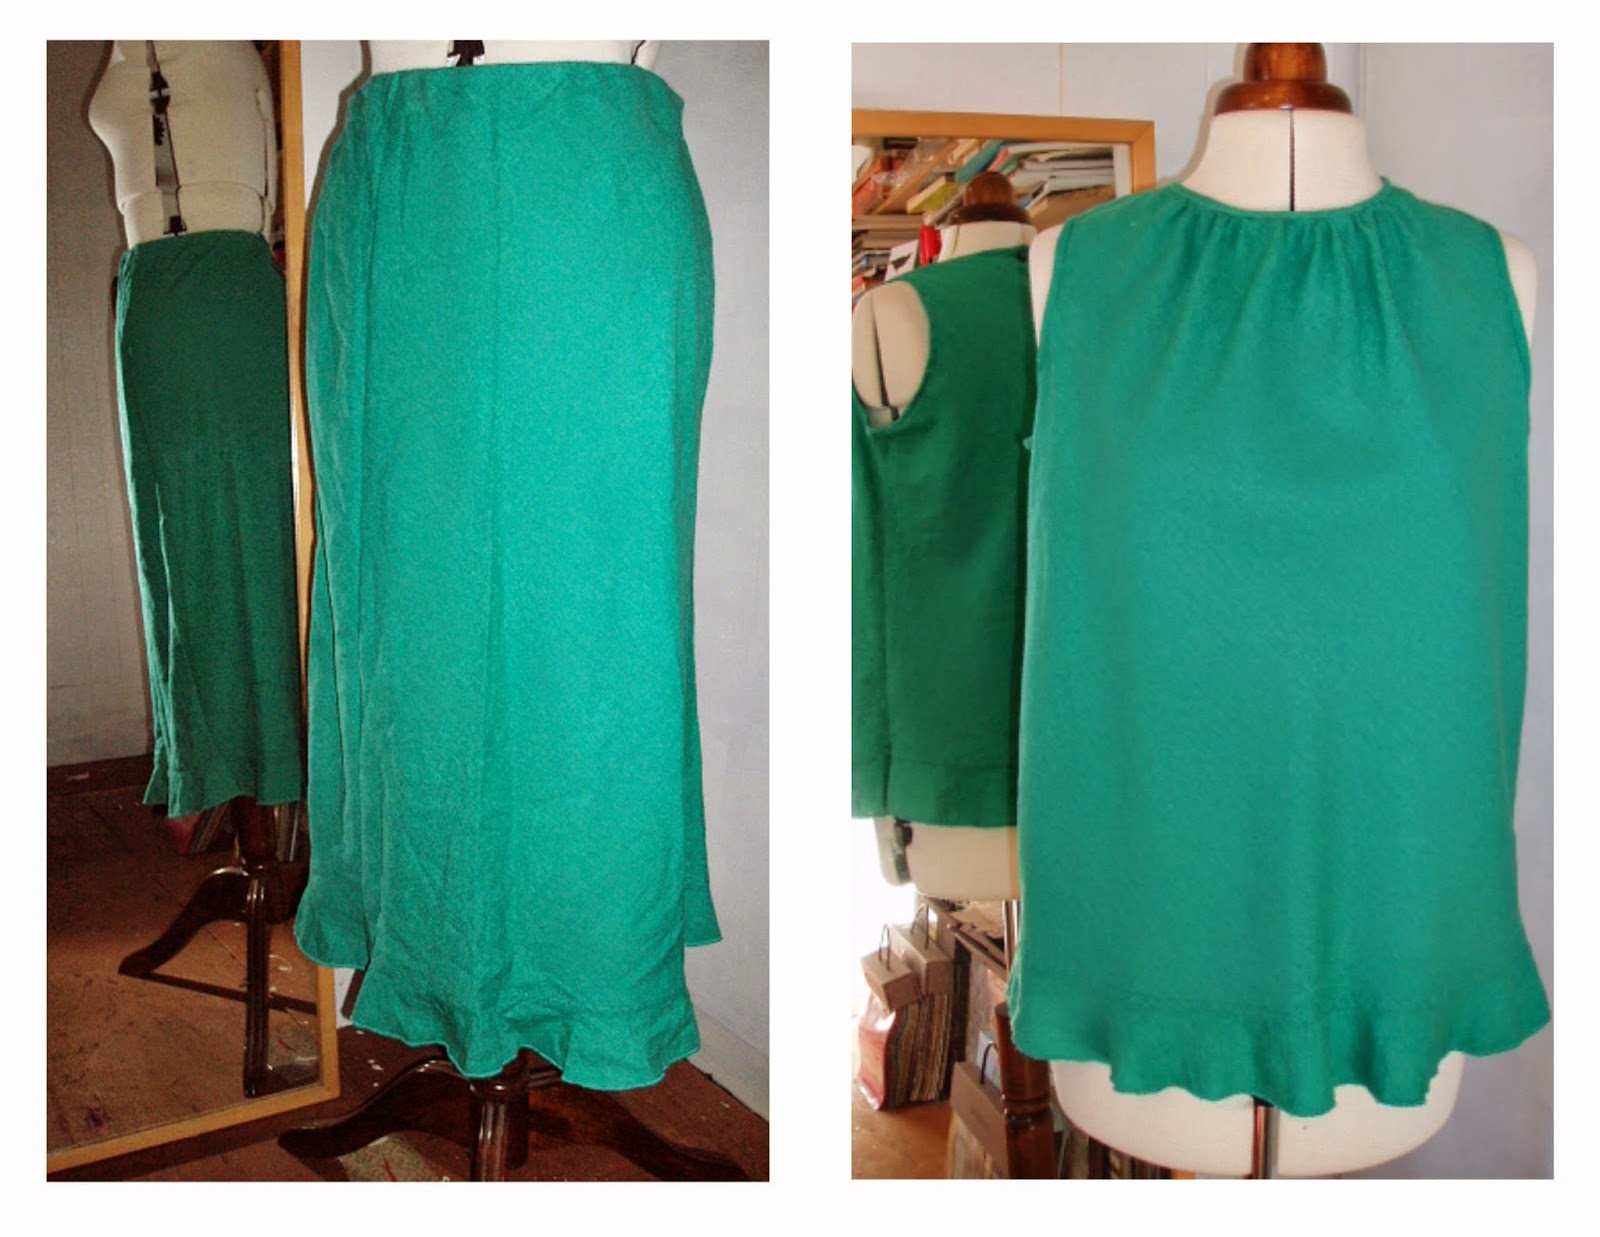
This poor skirt was sitting on the euro rail last year - I got it as I like green, and its a viscose linen. As a bias skirt - I wouldn't be able to wear it, bias enhances any potential curve (I think bias skirts are to be avoided at all costs for pear-me ......) but as a top it could work out quite well indeed - I probably should have ironed the skirt before photographing as the creases do it no favours.
I had come across a few versions of this marfy top online, and I was also curious about their patterns as there was a discussion on them somewhere on fb - so as this pattern was free, it was one way to find out. I cut for a size 44 and did french seams. I double checked on seam allowances before cut, and there are none so I added 1.5 all round, and as there would be no hem allowance, I decided to use the frill as the hem (which turned out to be an excellent decision).
I ironed a crease at the centre front and centre back of skirt pieces to get the true bias, before laying the pattern over each. In the pattern layout photo, the pattern is laid on the fold and then the side seam hem edge is at the skirt frill join on both, so that worked as my 'marker' or notch when I went to sew, I then marked 1.5cm seam allowances at the sides, armholes, and neck. I put a small facing on the back for the opening, and then sewed the top, gathered the front and then bound the edges. I decided not to use the neck band as I had seen one version without and liked that, and when I went to cut I may not have had sufficient fabric for the bands (judging from what was left over). The top was quick enough to run up, and probably quicker for anyone else as I tend to hand hem bindings (my machining of them is rough at best), but in all I think it was 2 or 3 hours (I took apart a dress in-between).
I am incredibly delighted with the top. This marfy pattern was easy to use but I don't know how true this is for their other patterns as they seem to give limited instruction from what I gather on their site - but then again, early vintage patterns don't give too many clues at the best of times either!. 
Uaine (wen-ya), is an old Irish word for green - it is specific to something being coloured green as opposed to naturally green, and this month is going to be a Uaine month! In January I did a bit of a rethink of what I was at with all this sewing and cutting, - and I am still without a master plan but now have a modus operandi!!!! I had to find some focus, as I seemed to have lots of ideas, and projects started all over the house. So now I am doing projects by the month and by general colour or theme as when I went through everything it turned out that there is currently enough charity shop buys to see me to the next 5 months of making! (its far too easy when things are 1 and 2 euro) So I divided them into colour and drew up some plans for each, and also catalogued my small stash, so now I am only working a month at a time to stop me flitting from project to project, and have a bag with the next 4, but no more................
I have now decided that overblouses are the best ever......... now that winter is coming, and jumpers are beckoning, an overblouse is a lot smarter (than some of my jumpers anyway) and I just love the pockets. The style of this overblouse is not unlike a 'kinsale smock' (or fishermans smock), and its perfect 'transitional' wear, when its too warm for a jacket, but too cool to not wear one. I had hoped to use up a red plaid from stash but there wasn't enough (but I have a plan for that) so I decided to use the plaid from a pleated wool skirt I got a long long time ago, adored the colours but couldn't think of what to do with it.
Plaid is a tricky one. Its not the hardest to match off once you decide where the match points should be, but when its off - its really off (the last worst match plaid I saw was 'Wolf of Wall st', Leonardo diCaprio's Prince of Wales suit). When learning factory cutting, we had to do plaids, and cut them in layers of 20 plus careful laying and planning is key and then it should all work out fine. I cut this top on the fold, but I can understand some people prefer to cut plaid on one layer only, the reason I don't is that I am more afraid of cutting 2 left fronts or something by forgetting to turn pattern pieces over.
I decided to put the main dark stripe as centre, as this gave the most fabric and I suppose 'technically correct for plaid' , however the side seams would be three square sides but it looked fine at that so I cut in.
So when I was cutting this, I matched my centre front and centre back lines at the same plaid point for the vertical and then worked up from hem lines, checking then, the underarm match lines and the lines at the shoulder each side of the neck. As this was a simple cut, this was straight forward enough but I had to pin it plenty for sewing to make sure the squares didn't stray.
So after all of this, I must have been a bit slap dash with darts and then one of my darts was slightly off, and fixing a slightly off dart is a lot more difficult than fixing the one that is miles off! (and ironically you could spot the slightly off dart a mile off).
The buttons were from the button tin, originally from black coat .... . I was going to include a collar, but the collar for this was designed to sit flat, and it looked a bit off, if there was sufficient fabric I may have tried one that stood up a bit, in the end, I used the collar as the facing.
I made a long-sleeve-tee to wear underneath - its a funnel neck. I did a basic pattern draft for it, and used a viscose jersey skirt -the weight and drape of this fabric was divine. Its was very quick, draft, sew, wear and I will be making more of these.
This is the most expensive pattern I have ever bought! ..... and I am beginning to be a fan of Pauline Trigere. I also love coats so thought at least this was a 3 for 1 pattern. I also thought I would do the dress first as it was probably easier than jacket/coat.(not so famous last words)
The bodice takes up a little bit more fabric than you would think (or I would think), so getting the right fabric, with right amount from a secondhand piece of clothing was the next hurdle (as in the pile of stuff on the chair beside mannequin). I did have an orange wrap skirt 100% viscose which I did first and then a blue silk wrap skirt as the next one.
I made the pattern to the envelope size, even though I am size or two larger on hips (classic pear). The skirt fits me - but just about. I thought if I made it to the envelope size it would give a truer indication of design, and then either i could finish for someone else to wear or use the fabric for something else.
The orange dress has the perfect weight for the dress, and ultimately the only issue I had were the facings - I used interfacing on autopilot where I shouldn't have, and they did not fit as well (I cheated and used a seam on centre back and front). Straps are still pinned on as the facings will be redone.
The dress is flat-lined which is something I have never done before (strangely enough), and it gave good weight and form to the bodice, which is a simple but a very effective cut. The fit of the bodice is great especially when you consider there are only 2 darts used. There is a short underskirt underneath, and a waist stay. The skirt has a small amount of gathers so I thought up-sizing would be little issue and if anything should be easier as there would be more fabric to gather in larger size.
The blue dress is a light silk (so I starched it plenty before I started!). The interfacing went on easily by stretching the bodice, and I decided I would also add the pockets for this dress (so handy). I am still undecided about the blue dress as the silk is so light I now think I could have used a heavier lining fabric, whereas the weight of the orange dress is perfect. I am unsure also about the extra gathers and wonder if soft pleats could work better....................... so I didn't hem this one yet either!
This is definitely a great upcycle as there were only tiny scraps left, and I forgot to take a photo of the skirt in its before state. The fabric is a purple polyester shantung, so easy to sew and easy to launder.
This pattern is so so quick. I traced the smocking dots and then used carbon paper to apply to the dress front. The direct smocking (unlike traditional english smocking) is super fast! I managed to get the dress cut from the skirt, and the lining was re-used also. The waistband became the belt (that still needs a buckle). I prefer the dress without the belt, but I think my sister prefers it with the belt.
The dress is simple to make, after cutting the front is smocked and some pleats tacked into place. the back has a zipper and two neck darts and then the back and front are sewn together. I lined the dress as there was no fabric for facings, and used bias binding on the neck and armholes after to strengthen them.
This dress has found its way to my sisters wardrobe as I made it in her measurements. and I intend to make another, and this one will include beading in the smocking. I got this pattern from Amanda at OhSewCharming .



.JPG "simplicity 4826")
.JPG "Simplicity 4826 Purple Smocked Frock - upcycle skirt to dress")
